Showing posts with label gelli printing. Show all posts

Tuesday, January 23, 2024

Head in the Clouds

Do you daydream?  Did you daydream as a child and slowly fall out of the habit as an adult?  I can understand that, for sure.  It can seem silly to daydream as an adult, but I don't think so.  I find I can daydream when listening to music, reading a book, or just relaxing.


This tag is about daydreaming, and the fun that can be had when you're off in the clouds.  I pushed gesso through a stencil, then diluted Artist's Loft Turquoise and Tim Holtz Ripe Persimmon paint with water and used paintbrushes to put a wash of both colors on the tag.  Then I used a brayer to put black paint on the gesso circles from the stencil.  After that it was a simply matter of adhering all the elements: punchinella, a die-cut star from Oddball Art, and two handdrawn clouds made from underpaper and gelli prints.  I added a few beads to the end of the string as well.  I finished with Sharpie pen doodle outlining and white paint splatters.


I've included affiliated links for items I used for this project or similar products.  If you click the link I get a small commission.  The price does not change at all for you.  Enjoy the links and thank you for your support!


Does anything catch your eye with tag?  Let me now in the comments!  I'm really glad you came by?


Thursday, December 28, 2023

A Time to be Merry

The week between Christmas and New Year's can be a little strange.  Do you get that feeling?   It's still holiday time, but many of you are probably back to work.  Do you like it quiet during this time or do you prefer loud and lots to do?

I'm in a weird spot, though I don't mind the quiet.  Not as much rushing around and it can be a nice time to relax.  Not that I mind getting together with friends and family.  And parties in between can keep the winter blues away.


Are you looking for something to add some punch to your art?  I actually have two ideas: tags and frames.  I love using both in my artwork.  They're easy and have that something extra that can compliment your creation!


I'm entering my ATC into the following challenges:

Simon Says Stamp Wednesday Challenge

Creative Fingers Challenge #268


I found a forgotten piece of patterned paper that I played around with and cut it up into a bunch of ATCs.  This one has some scribbles from markers and pens, then I added some paint through some stencils.  I added a little die-cut frame, a tag I cut from that same patterned paper experiment, a funky star that I die-cut from a gelli print, a piece of washi tape, and a plastic star from my stash.


I've include affiliated links for items I used for this project or similar products.  If you click the link I get a small commission while keeping the price the same for you.  Enjoy the links and thank you for your support!


See anything you like about this ATC?  Let me know in the comments!  Have an awesome day!


Sunday, December 24, 2023

ATC Naughty List

I'm enjoying some holiday fun with my family, so I set up some posts ahead of time.  When it comes to the holidays, I love the Grinch.  Everyone has different feelings about the holidays, but I feel like the Grinch is a welcome friend.  It's a nice redemption story but also a fun way to be a little snarky and sarcastic during the holidays.  And I think at the very least, the Grinch started out on the Naughty List, especially when he's throwing his own kind of party for the holidays.


However, since I'm lacking Grinchness in my craft stash, I used an Octopode Factory digi stamp with a mini alphabet stamp set for the sentiment.


I'm entering my ATC into the following challenge

Simon Says Stamp Wednesday Challenge


A forgotten piece of patterned paper got cut up into a bunch of ATCs.  This one has some old markings, that might be from actual markers.  There's also paint through some stencils.  I added a die-cut frame, my digi girl, and a funky star for a fun, and maybe little bit naughty, holiday party fun.  The star is from an old gelli print.

I've include affiliated links for items I used for this project or similar products.  If you click the link I get a small commission while keeping the price the same for you.  Enjoy the links and thank you for your support!


Please let me know  hope you like the ATC!  Let me know what you think in the comments and have a great day!

Saturday, December 2, 2023

Fa la la la

Hey everyone!  Happy Saturday, for a little longer anyway.  I have a really cool tag to share with you for the holiday season.

There's quite a bit going on with this tag, and it's really cool.  I had been experimenting with my supplies and used the tag as a mop up page of sorts.  Then I added another layer and got stuck.  It can be difficult, even when playing, to do a step, then not know the direction you want to go in.  That was where I was.  I liked certain parts and didn't want to cover those up, but I still needed to do something.  Have you ever had that happen, when creating art or in real life?


I'm also entering my tag into the following challenge:

Simon Says Stamp Monday Challenge


I also have to remember I have a LOT of supplies.  So there's no wrong answer, it's more about how you're feeling.  So the tag had some Dylusions Calypso Teal and Postbox Red smeared on it, then I used some of a mixture of Liquitex Gesso, Liquitex Bright Aqua Green, and Ranger Gel Medium and pushed through my Dylusions Trees stencil. 

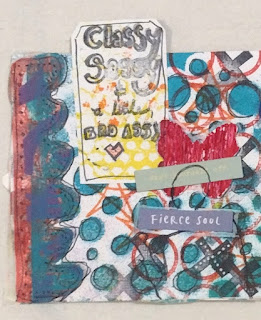
I used Archival black ink with a Dylusions corner arrow stamp.  The left side scallop border is from a gelli print done long ago.  Then I grabbed other goodies to add to my tag.  Some legs from a Dylusions stamp set that I colored with Tombow and Artist's Loft markers.  Alphabet stickers, a wood chip, a yellow chipboard star and two star stickers later my tag seemed to be ready.  I did raid my ribbon collection for trims that would work well with this tag.  I think I found some nice ones!

Please let me know what you think in the comments!


Thursday, November 23, 2023

Happy Thanksgiving!

 I scheduled this to post today because like many of you, I hope, I'm enjoying Thanksgiving dinner with my family.  I truly hope you enjoy this holiday, whoever you're celebrating it with.  I also hope you find at least one thing to be thankful for, especially if you've been going through a tough time.  It can be hard to see in hard times, but there's always something to be thankful for, small or big, simple or complicated.  So Happy Thanksgiving and enjoy this visit to a previous post about being thankful.

++++++++++++++++++++++++++++++++++++++++++++++++++++++++++

Hey everyone, I hope you're enjoying the rest of your weekend.  Weekends can be tough.  It's a terrific break from regular life, but they can also go by really quickly, right?

Simon Says Stamp has a new challenge, with is Thankful.  I do my best to be thankful, for all the things in my life.  Even the challenges are good because those are opportunities to discover new ways of thinking or come up with new ideas.  And of course, Thanksgiving is coming up, which reminds us all to be thankful for not only the good things, but the challenges.

Simon Says Stamp Monday Challenge

I made an art journal page for this theme, and it's kinda funny.  My art journal has a lot of mop up pages.  Sometimes that helps me, sometimes it can block me.  Other times it can inspire me, but I add back in detail I really like.  In this case, I was going to keep part of it, then changed my mind and covered it up, but added back in details.  I had stenciled some red stars from a Dylusions stencil, but covered it up with more paint to make my spread.  I added it back in after composing my page and I think I really like the results.


The numbers in the purple are leftovers from the mop up, but I covered everything else, though I hadn't planned to.  I combined Liquitex Titanium White with Liquitex Bright Aqua Green, and covered the left area with just the white.  Then I added Artist's Loft Neon Green and some Artist's Loft Orange mixed with white to add some more interest.


I added a strip of washi tape, spots of Heidi Swapp Number Rub-ons, and traced a Viewfinder stencil with a red Tombow marker.  The TO is Heidi Swapp Alpha Stickers with Dylusions Calypso Teal Color Spray.  I used a journaling card from my stash, swiped some orange paint on the edges, then used Archival black ink with a small stamp set from my stash for WEEK.  I used an alphabet stamp set with Distress Ink Festive Berries for SAY and the "thank you" is from an American Crafts Thickers set called Wild.  The star is from a gelli printing session complete with doodles from both a Sharpie pen and a water-based white Sharpie paint marker.


I've included affiliate links to many of the products I've used or similar products, which means if you use the links to make a purchase, I make a small commission with no price increase for you.  I really appreciate your support.

I hope you enjoyed my art journal page as much as I did making it.  Are there any challenges you're thankful for this year?  What else are you grateful for this year?


Tuesday, November 21, 2023

Meh

Sometimes you just feel like you want to step back from everything.  I know I have that feeling at times.  To just take a break and not have to care about anything.  Or sometimes you're just having an off day.  We all have them.  Could be the weather, could be stress from life, could be just not wanting to worry about anything.

So I felt "Meh" summed up quite well the feeling.


There's quite a bit of doodling on this ATC, along with gelli prints.  I used a Uni Posca Paint Marker in Emerald Green and a white water-based Sharpie paint marker for most of the doodles.  I also used a blue watercolor crayon from a set I have to used around the circles cut from gelli prints, and outlining the details with a Sharpie pen.  I also used the pen and paint markers around the edges as well.


I'm entering my ATC into the following challenges:

Lil Patch of Crafty Friends

The Crafty Addicts


I've included affiliate links to many of the products I've used or similar products, which means if you use the links to make a purchase, I make a small commission with no price increase for you.  I really appreciate your support.
 
When do you feel not so fantastic?  Do you take time out for yourself?  Please feel free to let me know in the comments!


Sunday, November 19, 2023

Thank You

Hey everyone, I hope you're enjoying the rest of your weekend.  Weekends can be tough.  It's a terrific break from regular life, but they can also go by really quickly, right?

Simon Says Stamp has a new challenge, with is Thankful.  I do my best to be thankful, for all the things in my life.  Even the challenges are good because those are opportunities to discover new ways of thinking or come up with new ideas.  And of course, Thanksgiving is coming up, which reminds us all to be thankful for not only the good things, but the challenges.

Simon Says Stamp Monday Challenge

I made an art journal page for this theme, and it's kinda funny.  My art journal has a lot of mop up pages.  Sometimes that helps me, sometimes it can block me.  Other times it can inspire me, but I add back in detail I really like.  In this case, I was going to keep part of it, then changed my mind and covered it up, but added back in details.  I had stenciled some red stars from a Dylusions stencil, but covered it up with more paint to make my spread.  I added it back in after composing my page and I think I really like the results.


The numbers in the purple are leftovers from the mop up, but I covered everything else, though I hadn't planned to.  I combined Liquitex Titanium White with Liquitex Bright Aqua Green, and covered the left area with just the white.  Then I added Artist's Loft Neon Green and some Artist's Loft Orange mixed with white to add some more interest.


I added a strip of washi tape, spots of Heidi Swapp Number Rub-ons, and traced a Viewfinder stencil with a red Tombow marker.  The TO is Heidi Swapp Alpha Stickers with Dylusions Calypso Teal Color Spray.  I used a journaling card from my stash, swiped some orange paint on the edges, then used Archival black ink with a small stamp set from my stash for WEEK.  I used an alphabet stamp set with Distress Ink Festive Berries for SAY and the "thank you" is from an American Crafts Thickers set called Wild.  The star is from a gelli printing session complete with doodles from both a Sharpie pen and a water-based white Sharpie paint marker.


I've included affiliate links to many of the products I've used or similar products, which means if you use the links to make a purchase, I make a small commission with no price increase for you.  I really appreciate your support.

I hope you enjoyed my art journal page as much as I did making it.  Are there any challenges you're thankful for this year?  What else are you grateful for this year?


Saturday, November 4, 2023

Join me for Day 29!

Hello and welcome!  I'm so glad you decided to join me!  Today I'm sharing the next page in my mini art journal for the Art Marks Challenge by Rae Missigman and Sandi Keene.


Day 29 - Uplift


I'm also entering the following challenges:

Addicted to Stamps Challenge


For some Art Marks Challenge history, you can click here.  And Rae's Instagram account here shows what she made for each prompt. I made a little art journal out of envelopes and baker's twine; simple but effective.  Though what Rae did with her pages was simple but very interesting.  She just used tape to add her pages to this chunky journal with a fabric cover.  Really amazing.  It reminds me to not stick to doing things only one way.  That there are always options when it comes to art.

How do you uplift yourself?  Or someone else?  Do you give a kind word, a hug, or are you the kind to bake cookies?  What does it mean to uplift someone?  And can you uplift yourself or just someone else?  And what does it even mean to uplift someone?  At the very least it means to lift someone up that would otherwise have stayed down.


The background is a gelli print that I actually didn't do a lot with.  I added some more color and some details with a Sharpie pen.   Then I stamped and colored an image with Tombow markers and added some die-cuts and sticker words.


Thank you so much for coming by and I hope you enjoyed this art journal page.  Bye for now


Friday, October 20, 2023

Join Me for Day 26!


Well hello!  For those who saw my sneak peek, earlier, welcome back.  If not, you're still in a for a treat!

Today I'm sharing the next page in my mini art journal for the September Art Marks Challenge from Rae Missigman and Sandi Keene.

Day 26 - Replenish


I'm also entering the following challenges:

Creative Fingers Challenge #264


Crazy is Our Fame Challenge

For some Art Marks Challenge history, you can click here.  And Rae's Instagram account here shows what she made for each prompt. I made a little art journal out of envelopes and baker's twine.  Simple but effective.  Though what Rae did with her pages was amazing, while also being simple.  She has this chunky journal with a fabric cover and she used tape to add her challenge pages to the existing journal.  Really amazing.  It reminds me to not stick to doing things only one way.  That there are always options when it comes to art.


To replenish usually means to refill, in a sense.  However, sometimes, if you take a break to replenish, you actually change something.  Taking time to replenish also is a time for introspection.  Sometimes that involves change.  You realize as you're refilling the tank, that you need to make changes to refill the tank.  What do you need to replenish?  How do you do it?  Have you ever taken time away to refill your tank and realized you needed to make changes in order to do that?  Or to make your refill last longer?


Sometimes I get intimidated by a blank page, and sometimes I get intimidated by a page filled with color and marks.  The background for this page is a small section of underpaper.  I really liked what was on the paper, but I still struggled.  I wanted to keep certain parts but I wasn't sure how.  So I decided to cover it up a bit and then add to it.  I first used a scribble stencil with some black paint.  And I thought about how while replenishing my energy, I've realized I've had to make changes.  I grabbed a couple die-cuts that were in that vein, and then used some card packing I had saved with the graph paper design and cut a scalloped border to go along the bottom, outlining it with my orange Uni Posca paint marker.


The fairy and the heart are digi stamps, from Oddball Art and Octopode Factory respectively, and colored with Tombow markers and colored pencils.  Then I used my Sakura Solid white paint marker and emerald green Uni Posca paint marker to make my top scalloped border.  I use paint markers a lot, and while I could use regular paint and a think paintbrush, a paint marker with a fine point works much better, especially if you're in a situation where you can't have the extra supplies.  It also helps with doodles.  It's much easier to doodle with a paint marker because it's like a pen.  So I have several paint markers from a few different brands.  Although not all paint markers are the same.  Some paint markers have different tips, so it is important to consider what you want to do with the paint markers.


In general, getting my paint from here works out very well for me.  Even the store brand is good quality.  Sometime you have to do a couple layers to get a good coat, but it all depends on how opaque you want the paint layer.  I find that sometimes I like the thinner layer so the underneath layers peek through.  That gives my art texture and dimension, which I love.


Thank you so much for coming by and I hope you enjoyed this art journal page.  Bye for now!


Thursday, October 19, 2023

Sneak Peek Time

 Please enjoy this sneak peek and tune in later to see more!  Enjoy and see you soon!


Thanks for visiting!  You're not going to want to miss this.  Bye for now!

Monday, October 16, 2023

Join Me for Day 23

I'm so glad you're back!  I'm sharing Day 23 of my mini art journal for the Art Marks Challenge that was hosted by Rae Missigman and Sandi Keene.  The challenge already ended, but I'm still catching up.  So today I'm sharing my page for the prompt Invent.

Day 23 - Invent


I'm also entering Simon Says Stamp's Monday Challenge.

For some Art Marks Challenge history, you can click here.  And Rae's Instagram account here shows Rae's interpretation of the prompts.  Rae made tiny cards and put them into this gorgeous little pocket journal, which is super thick.  I think it has fabric covers as well.  Swoon!  I love chunky journals and textures

 So for the prompt Invent, I remembered when I had been playing with gelli prints, I had used a small stencil from Balzer Designs that's a light bulb.  It's blurry, but I like how it turned out.  And I knew it was perfect for this prompt.  I was also thinking about the process of inventing.  When you're inventing,you're usually writing and drawing.  So I used some patterned paper with words all over it and ran it through my Cuttlebug using Altenew's Flat and Fold Alphabet Dies.  I did some of the letters backwards, whoops!  Then I thought, when you're inventing, things happen.  So I kept the backwards letters.


I added a few die-cuts from my stash. I also used two paint markers, both Uni Posca, in white and emerald green.  Then I used my Liquitex Liquid Ink in Naphthol Crimson to make some lovely, funky drips!


 Thank you so much for stopping by and checking out my art journal page.  Bye for now!


Sunday, October 15, 2023

Mini Art Journal Day 22

Welcome back my friends!  I shared a sneak peek, and as promised, this post will have all the details and pictures!  I'm so glad you could join me today!

I'm sharing another page in my mini art journal for the Art Marks Challenge from Rae Missigman and Sandi Keene.

Day 22 - Less


I'm also entering my page into these challenges:

A Place to Start - October 2023

Creative Fingers #263


For some Art Marks Challenge history, you can click here.  And Rae's Instagram account here shows what's she's making for each prompt.  For those who haven't seen my previous posts yet, I'm working in a mini art journal I made out of envelopes, but you can use many different things, including scrap or underpaper, so some pages already had stuff on them.  A hole punch and some baker's twine later and a mini art journal for the challenge ready for art!

I've mostly posted individual pages.  This challenge has been very interesting thus far, because it makes you think.  Sometimes a good brain dump on your art journal page is just what you need.  Whether it's actual writing that you incorporate, writing that your art covers up, or the art itself represents the brain dump.

For this prompt, I had to really consider it, especially because I like putting more on my pages, not less.  However, there's more than one way to have less or be less.  I think it's more that some people need less self-doubt, less hurt, less being stuck.  So I think this page works well.


My page started as some mop up paint and and then I added part of a gelli print on deli paper to add more dimension.  One stencil I used on the gelli print is The Crafter's Workshop Pie Chart with green paint.  I added black paint from Artist's Loft through a Dylusions border stencil, and a eyeball flower digit stamp from Oddball Art.  

I also used the bigger plus signs/"X"'s from a Balzer Designs stamp set with Ranger Archival black ink, as well as a triangle stamp with ColorBox Blue Lagoon pigment ink.  You can also see where I added some doodles tracing the chevron part of the pie chart stencil with one of my favorite supplies, paint markers.  In this case, a Uni Posca paint marker in Emerald Green.  This paint marker is a weird one because the color doesn't look at all green, but it's still a wonderful color.


I also used my trusty Sharpie pen for some tracing and added my sentiment from a rubber stamp and the same Archival ink.  Here's a great place to get acrylic paint. There's several brands to choose from, the prices are reasonable, and they carry a huge number of colors and types of paint (like heavy body and free flow).

Thank you so much for stopping by and checking out my art journal page.  Bye for now!


Sneak peek

 My newest art journal page...come back soon for all the details!


Sunday, October 1, 2023

Mini Art Journal Day 18


Hi there my crafty friends!

I'm so glad you're visiting!  I have another page in my mini art journal for the Art Marks Challenge from Rae Missigman and Sandi Keene.

Day 18 - Tend


I'm also entering my page into these challenges:

Simon Says Stamp's Wednesday Challenge - Anything Goes


For some Art Marks Challenge history, you can click here.  And Rae's Instagram account here shows what's she's making for each prompt.  For those who haven't seen my previous posts yet, I'm working in a mini art journal I made out of envelopes.  You can use many different types of paper, including scrap or underpaper.  A hole punch and some baker's twine later and a mini art journal for the challenge ready for art!

I've mostly posted individual pages, and I do plan to post them all.  This challenge has been very interesting thus far, because it makes you think.  Not that I mind thinking.  Sometimes a good brain dump on your art journal page is just what you need.  Whether it's actual writing that you incorporate, writing and your art covers it up, or the art itself represents the brain dump.


When I saw the prompt, a lot of ideas swirled in my head.  What do you think of when you hear the word "tend."  Granted, the word tend has different meanings.  However my mind immediately went to the definition of caring for something.  You can tend your child(ren), a garden, a relative, or even yourself.  I've been doing a lot, in a sense trying to do everything, even though that's impossible.  So tending to myself can fall by the wayside.  And I think many people fall into that.  Everyone gets busy with life: work, kids, friends, taking care of the home, and I'm sure you can come up with many more.  Tending to yourself, caring for yourself, can get pushed the bottom of the priority list, which isn't good either.  So I need to tend to myself more.

My background is actually two layers of gelli prints.  One is on cardstock, the other is on deli paper.


I used a border stamp from Dylusions Inbetweenies stamp set, with Ranger Archival black ink, and  heart stamp with Ranger Distress Ink in Salty Ocean.  I know I've said it before, but I love my Ranger archival ink.  I really want it in more colors.  And there's lots!  Sometimes I don't mind the ink not being crisp or maybe spreayed with water and a tag dragged through it for a nice effect.  But the archival ink always give a crisp image and doesn't smear.  You can add any wet medium over it and it will stay put.


All the die-cuts are from my stash. I used a Sharpie pen and my Uni Posca white paint marker for the doodles.  I also used a red marker from my lovely Tombow markers to add some doodles to a die-cut.


Thank you so much for stopping by and checking out my art journal page.  Bye for now!

Friday, September 29, 2023

Mini Art Journal Day 17

Hi there my crafty friends!

I'm so glad you're visiting!  I have another page in my mini art journal for the Art Marks Challenge from Rae Missigman and Sandi Keene.

Day 17 - Poise


I'm also entering my page into the following challenge:

Creative Fingers Challenge #262


For some Art Marks Challenge history, you can click here.  And Rae's Instagram account here shows what's she's making for each prompt.  For those who haven't seen my previous posts yet, I'm working in a mini art journal I made out of envelopes, but you can use many different things, including scrap or underpaper, so some pages already had stuff on them.  A hole punch and some baker's twine later and a mini art journal for the challenge ready for art!

I've mostly posted individual pages, and I do plan to post them all.  This challenge has been very interesting thus far, because it makes you think.  Not that I mind thinking.  Sometimes a good brain dump on your art journal page is just what you need.  Whether it's actual writing that you incorporate, writing and your art covers it up, or the art itself represents the brain dump.

For this day's prompt, Poise, what defines poise to you?  What gives one poise or how is it expressed?  Being poised could mean to be balanced.  It can also mean holding oneself or an object in a certain manner.  I've heard being poised and being graceful can go hand in hand, which is certainly one way to look at it.  I like that my page shows being balanced between having fire while not sacrificing respect for yourself.


My background is another gelli print, a simpler one.  I was experimenting with sprays, which I really love.  I love the effects you can create with them.  They dry fast, but depending on how you spray, they can stay wet long enough to mix colors.  I also love using the top part for adding drips or tiny drops.  I was using a Dylusions stencil with some Heidi Swapp Color Shine sprays.  They're sparkly, but not overwhelming.  I don't mind some sparkly, but I don't necessarily go fully glitter, sequins, etc.  So these sprays are really nice.  I used Teal with the Dylusions stencil.  The Color Shine sprays came in many colors, like Sweet Mint, Raspberry, and Ocean.


I added a border out of gelli printed deli paper that I made using various paint colors, some die-cuts, doodling with my Sharpie pen and my Uni Posca white paint marker.  The butterfly is from a package of corrugated cardboard shapes from my stash, colored with a red paint marker.  I also added stamping with Archival black ink.  The tag is actually an experiment.  I used an acrylic stamp from Badass Art on some scrap and I really liked it, so I cut it into a tag to use later.  Enter later.  My Sharpie outlined the edge, I added a tiny heart from Oddball Art.  I also traced a Dylusions girl mask near the bottom for some added punch.


Thank you so much for stopping by and checking out my art journal page.  Bye for now!


Sunday, September 17, 2023

Mini Art Journal Day 13

Hi there my crafty friends!

I'm so glad you're visiting!  I have another page in my mini art journal for the Art Marks Challenge from Rae Missigman and Sandi Keene.

Day 13 - Whittle


This one was a real challenge.  Even though I have tried to rid my life of things are may not be as important as they once were, or I'm seeing things from a different perspective, it's still a process.  You can look at it as losing things, or as freeing yourself.  Could also be a combination.  I thought about it a lot and what it meant for me.  I have been trying to clean out my life.  Remove what doesn't work, and instead of seeing it as losing something, I'm trying to remember what I gain.  Space in a physical sense perhaps (such as having a garage sale or donating items you no longer want or need), or perhaps you can find peace is deciding what's important to you emotionally.  So in whittling away at my life, it is about remembering who I am, and that it's to help me care for me so I can life my best life.

I'm also entering my page into these challenges:

Creative Fingers Challenge #261

Crazy is Our Fame September Challenge


For some Art Marks Challenge history, you can click here.  And Rae's Instagram account here shows what's she's making for each prompt.  For those who haven't seen my previous posts yet, I'm working in a mini art journal I made out of envelopes, but you can use many different things, including scrap or underpaper, so some pages already had stuff on them.  A hole punch and some baker's twine later and a mini art journal for the challenge ready for art!

I've posted either groups or individual.  We'll see how I'm feeling for the rest.

I have a lot of gelli print papers from printing sessions I've done in the past.  This background paper featured at least two different stencils.  You can see a backwards print of Dylusions numbers stencil.  When you're gelli printing, you can do reverse prints, masking, layered stencils, oh the possibilities!  I used Liquitex Basics in yellow, ultramarine blue, and free flow aqua green.


I stamped a simple message that I felt was a whittled down version of a speech one could give on being true to one's self.  It's a snarky phrase from a Badass Art stamp set I got from a company of the same name out of Poland.  You can also see a die-cut star from my stash.


I also added a couple strips of washi tape and a pair of legs from a larger stamp from a Dylusions set and colored with Tombow markers.


I also added the sentiment die-cut "Seize the Day" is also from my stash.  Lastly I added some doodles with my Sharpie pen.

Thank you so much for stopping by and checking out my art journal page.  Bye for now!


Friday, August 25, 2023

Gelli, gelli, who brought the gelli?

Plate, that is.  If you've never heard of it, that's okay.  I gotta tell ya though, it's a wonder.  It's magic.  It's so versatile and lovely.  Okay, I'm done now, maybe.

You really can do so much with a gelli plate.  It's jello made in a scientific way to it doesn't go bad and instead makes artistic wonders.


To gelli print you need a few supplies: gelli plate, brayer, paper, acrylic paints, and texture tools.

Here's a couple different gelli plate options:

Gel Press Gelli Plate 8x10

Gelli Arts Gelli Plate 8x10

 I believe Speedball also makes one.  Gelli Arts and I think Gel Press make several different sizes.  Gelli Arts also has small ones in different shapes.  So the possibilities are really endless.

A brayer is like a paint roller, only smaller and for art, not painting a room in your house.  Brayers also come in slightly different designs, but are very similar and work the same.

This is the one I have, and it works well for me.  Here's a couple more option as well:

Rubber Brayer, 4 inches

Speedball Rubber Brayer, 4 inches

When it comes to paper, you can use almost anything.  I've used notebook paper, cardstock, heavy white paper, deli paper, tags, manila folders.  According to Gelli Arts, newspaper ink can get absorbed into the plate as can photo paper coating.


Any kind of acrylic paint can be used, but I have found that less is more.  Too much paint, and its rolling over the sides.  You can always add more.  You want a thin layer, otherwise the texture can get lost.  I've done it myself, and it's not horrible, but I prefer the clearer prints.  This is actually where the type of paint is important.  I've used fluid or free flow paint before, but since it's thinner, you could end up with more than you bargained for.  Fluid or free flow is good for some things, but use a careful hand when pouring.  Or pour it on a piece of paper, roll the brayer in it and then roll it onto your plate.  All that being said, it's entirely possible for some bits or sections to stay on the plate.

In that case, you can do one of two things.  You can pull the paper off enough to see if it's sticking, and press down on the paper more to pull the paint, or you can do clean-up or ghost prints.  Another trick I've learned from printing and watching videos by other artists is you can apply white paint to your plate and that will pull anything leftover onto your paper.


 Last is texture tools, and these can be so many things.  Anything really.  A bamboo skewer you use to make lines, fabric, leaves, stencils.  You can also take old credit cards and gift cards, cut notches into them at different points, and drag them across for texture before pulling prints.


As you do it more, you'll learn you can experiment with many things.  I've seen videos for image transferring and using alcohol ink.  I myself have used packaging from other items to make circles or just weird random patterns that only that object can make.  When it comes to stencils, you can also pull the stencil print, then pull the other print separately, or add another layer of paint for a little or a lot of contrast and pull the print.


I've included some recent prints from a session, some of which has already been cut up and used on other projects.

Thank you so much for visiting!  Bye for now!

Wednesday, August 2, 2023

Anything Goes ATC Style

Update: Links are fixed!  Thanks for your patience!


I love ATCs, otherwise known as Artist Trading Cards.  They're the size of traditional trading cards, such as baseball, but they're mini works of art.  Low commitment and expectation due to the small surface, but also great for experimentation.

This week the Monday Challenge for Simon Says Stamp is Anything Goes.  So I went with an ATC to play around with.  I grabbed a journal card from my stash, trimmed it to size with my American Crafts paper trimmer, and went to work.  I will say I've had this paper trimmer for a long time and it still cuts like it's brand new, at least in my crafty opinion.  Mine is definitely well-loved.

A little housekeeping before I get into how I made this little beauty.  As an Amazon Associate I earn from qualifying purchases.  Some products I've used I've included links to add these fantastic goodies to your supply.  Now, on to the making!


I started with some gelli printed deli paper that I adhered with a gluestick.  The stencils include an older Dylusions stencil with bricks and large numbers, a clean up print, and Tim Holtz Layered Stencil Patchwork Stencil.  I'll do another post about that.  The grungy alpha stamp is from Paperbag Studios called, aptly enough, Grunge Alpha.  This was I think the stamp's maiden voyage.

I also used Avery Reinforcement Labels, a chipboard circle, a orange and white striped triangle sticker from Pinkfresh Studios Dream On collection, a Citrus Twist Phrase Sticker (the yellow one), and two phrase stickers from a random sheet I have.  I've had monthly memberships with a couple different companies, so I have lots of supplies that aren't commercially available.

For the border I used an Emerald Green Uni Posca Paint Marker with a bullet tip.  You can purchase them individually, but this is a good starter set of the basic colors, plus black and white.  Never underestimate the glory of black and white paint markers, they're worth their weight in gold!  I love colors, don't get me wrong, but I tell anyone I discuss my art with, white and black add that amazing pop to colors.  Nothing like it.  I also love black and white pens, which are also worth their weight in gold.  One of my favorites is this Fine Point Sharpie Pen.  It's slim and easy to hold, gives a nice line that's not too thick, and the felt tip writes on most surfaces.

A finishing touch is a little transparent plastic arrow from my stash.  Thanks for checking out my project.  Bye for now!


Busy, busy, busy...

I am so sorry I have been absent without a word.  Life can definitely get busy and sometimes unexpected events lead to adjustments. I will b...