Showing posts with label Ranger. Show all posts

Thursday, November 23, 2023

Happy Thanksgiving!

 I scheduled this to post today because like many of you, I hope, I'm enjoying Thanksgiving dinner with my family.  I truly hope you enjoy this holiday, whoever you're celebrating it with.  I also hope you find at least one thing to be thankful for, especially if you've been going through a tough time.  It can be hard to see in hard times, but there's always something to be thankful for, small or big, simple or complicated.  So Happy Thanksgiving and enjoy this visit to a previous post about being thankful.

++++++++++++++++++++++++++++++++++++++++++++++++++++++++++

Hey everyone, I hope you're enjoying the rest of your weekend.  Weekends can be tough.  It's a terrific break from regular life, but they can also go by really quickly, right?

Simon Says Stamp has a new challenge, with is Thankful.  I do my best to be thankful, for all the things in my life.  Even the challenges are good because those are opportunities to discover new ways of thinking or come up with new ideas.  And of course, Thanksgiving is coming up, which reminds us all to be thankful for not only the good things, but the challenges.

Simon Says Stamp Monday Challenge

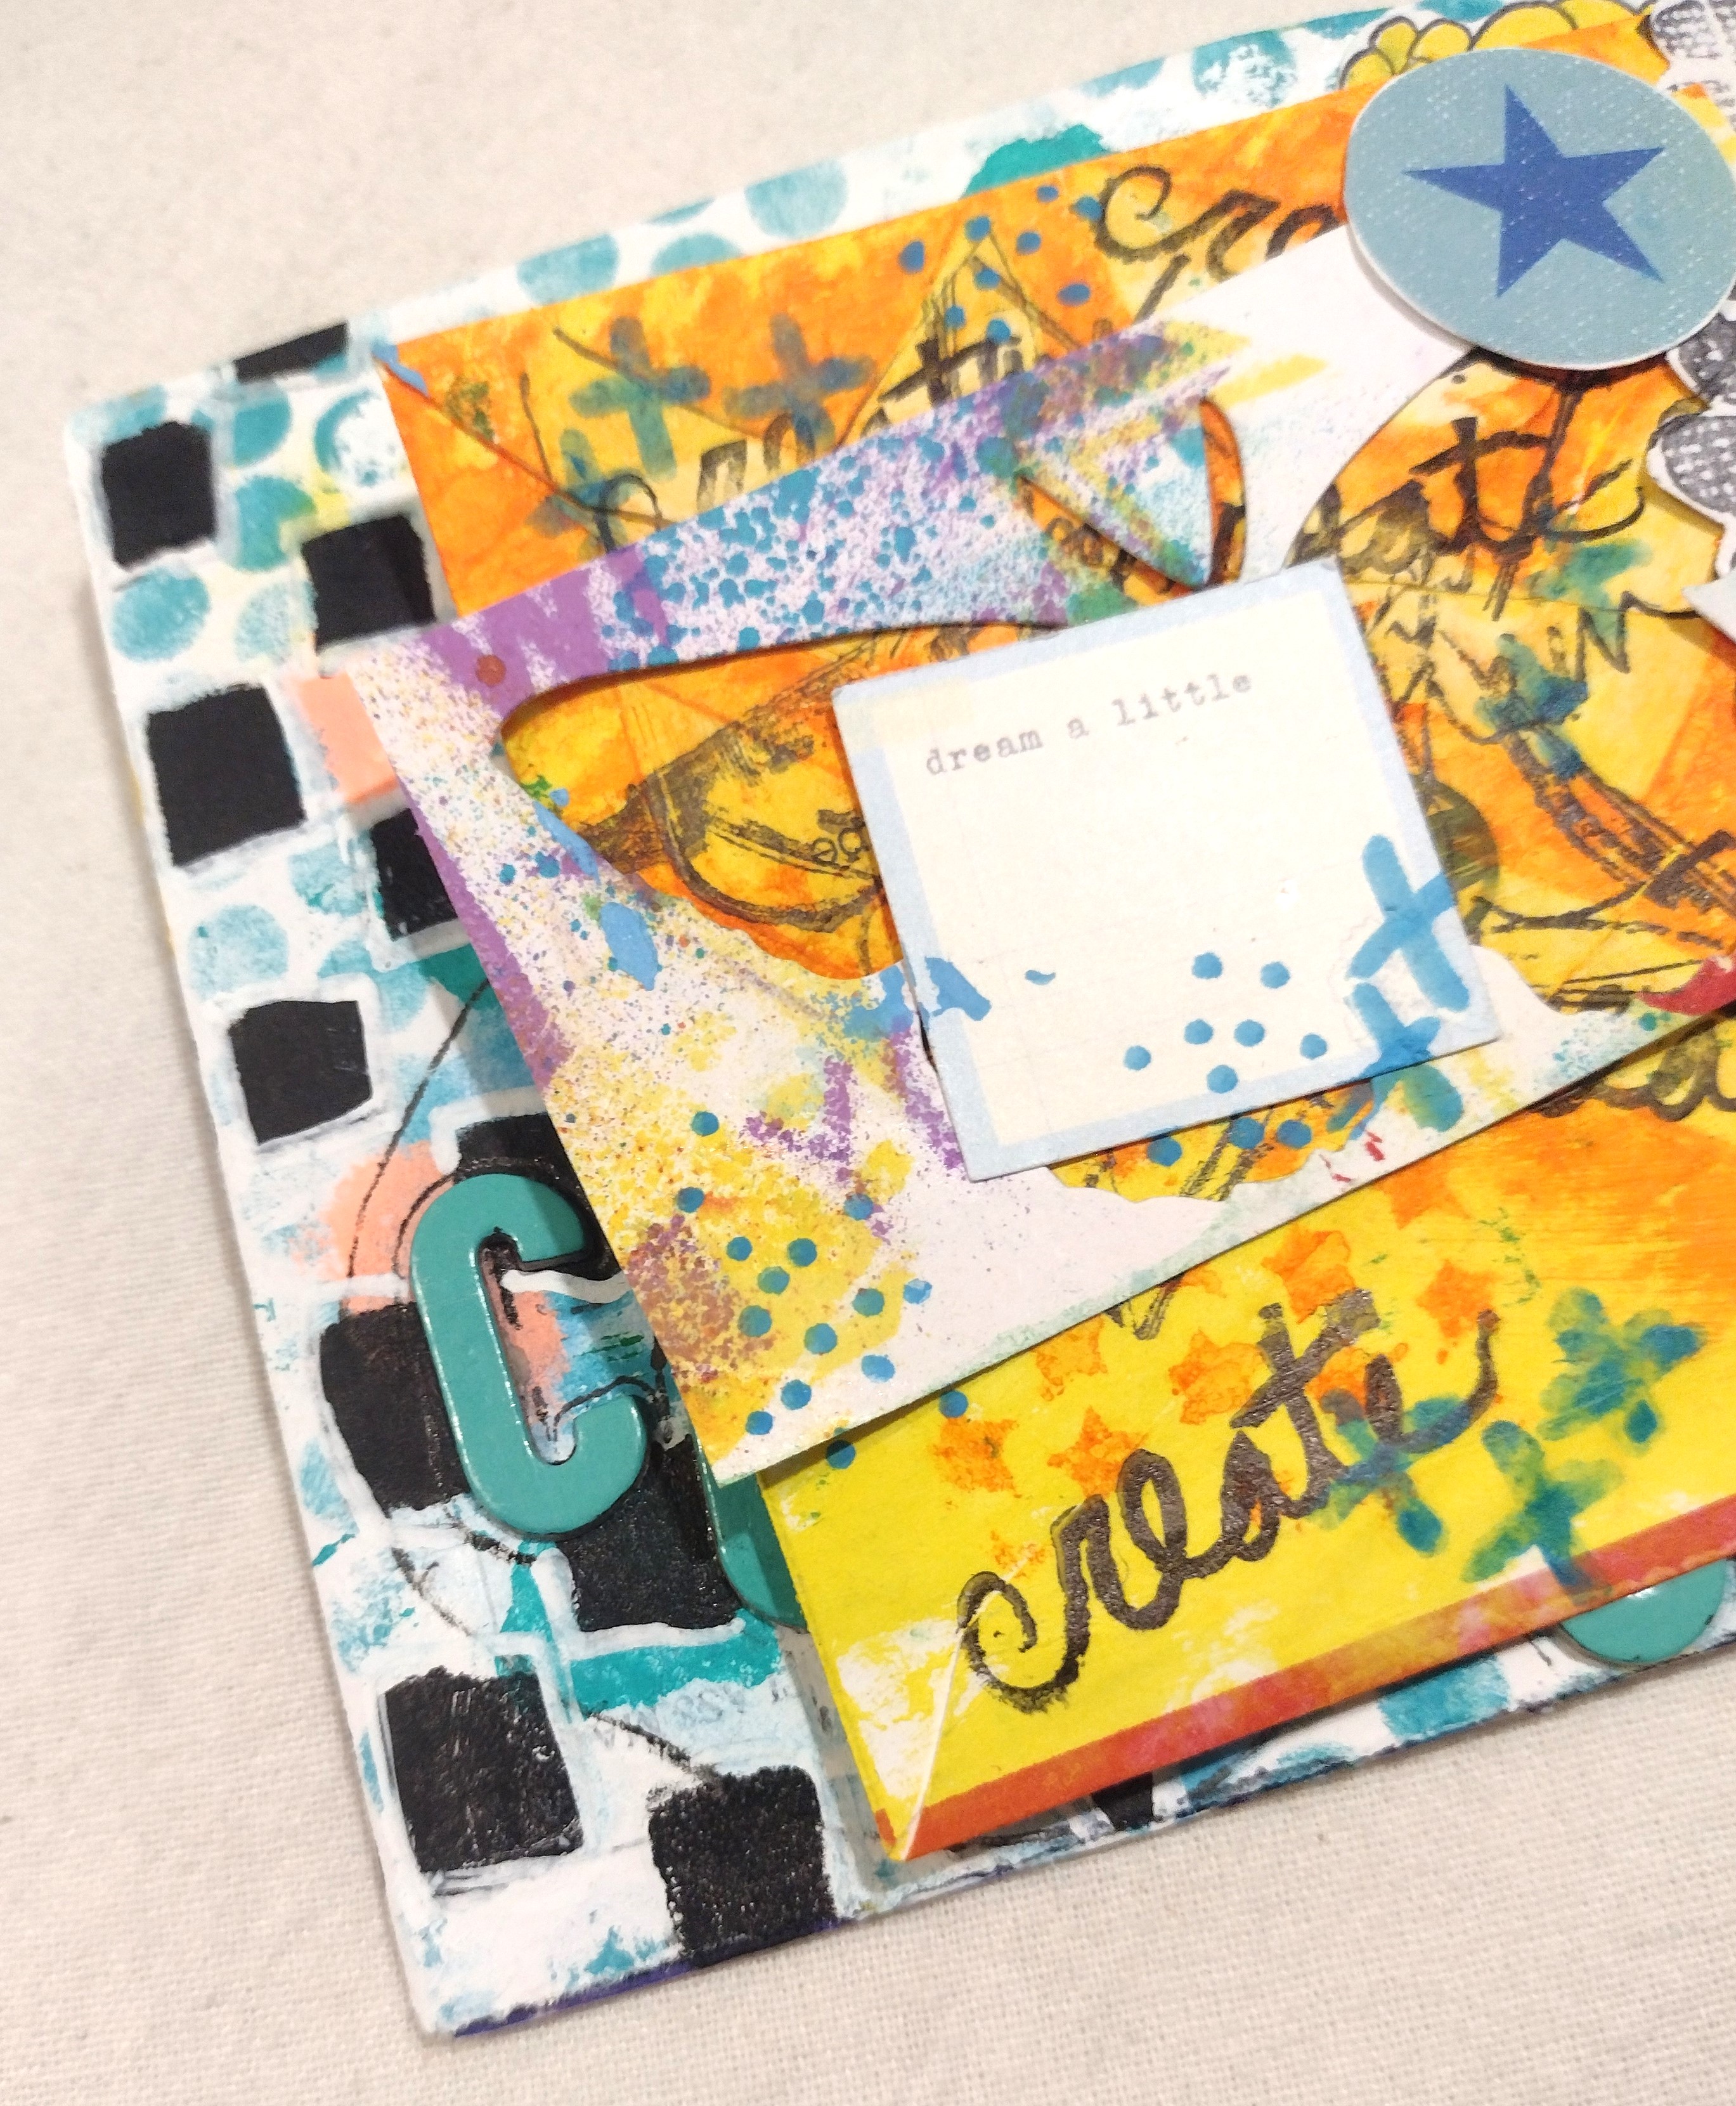
I made an art journal page for this theme, and it's kinda funny.  My art journal has a lot of mop up pages.  Sometimes that helps me, sometimes it can block me.  Other times it can inspire me, but I add back in detail I really like.  In this case, I was going to keep part of it, then changed my mind and covered it up, but added back in details.  I had stenciled some red stars from a Dylusions stencil, but covered it up with more paint to make my spread.  I added it back in after composing my page and I think I really like the results.


The numbers in the purple are leftovers from the mop up, but I covered everything else, though I hadn't planned to.  I combined Liquitex Titanium White with Liquitex Bright Aqua Green, and covered the left area with just the white.  Then I added Artist's Loft Neon Green and some Artist's Loft Orange mixed with white to add some more interest.


I added a strip of washi tape, spots of Heidi Swapp Number Rub-ons, and traced a Viewfinder stencil with a red Tombow marker.  The TO is Heidi Swapp Alpha Stickers with Dylusions Calypso Teal Color Spray.  I used a journaling card from my stash, swiped some orange paint on the edges, then used Archival black ink with a small stamp set from my stash for WEEK.  I used an alphabet stamp set with Distress Ink Festive Berries for SAY and the "thank you" is from an American Crafts Thickers set called Wild.  The star is from a gelli printing session complete with doodles from both a Sharpie pen and a water-based white Sharpie paint marker.


I've included affiliate links to many of the products I've used or similar products, which means if you use the links to make a purchase, I make a small commission with no price increase for you.  I really appreciate your support.

I hope you enjoyed my art journal page as much as I did making it.  Are there any challenges you're thankful for this year?  What else are you grateful for this year?


Sunday, November 12, 2023

A Feather in Your Cap

How is it the weekend already?  Sometime the week goes by in a flash, and sometimes it drags, but the weekend always seems to go fast.  I hope you're enjoying your weekend and doing something fun.  A big part of life is filling your tank.  I don't mean gas for your car, but kinda.  I'm talking your emotional tank.  Doing something fun, being with people you care about and who care about you, and maybe enjoying some outdoors.  Breathing fresh air, there's just nothing like it.

Now I don't know about you, but I like to play.  Paint, stamps, stencils, there's no end to the glory of art supplies.  They're all so awesome!  But sometimes I get stuck.  I want to just put everything together, but I don't always have the patience.  Sometimes I freeze up because it's not going the way I thought it should.  And I have to remember there's no should.  It's something I'm always practicing, because there's really no end to playing.

Case in point, this ATC.  It did not go as planned, but I was inspired by a video I saw on YouTube, only in the video it was a tag.  And while I didn't have everything in the video, I used what I had, including a stamp from a stamp set I had never used before this.


I have a bunch of ATCs and tags that have bits of paint and gesso and all kind of media on them.  This ATC is one of them.  I had put Liquitex Gesso through a TCW's Ledger stencil and it had some Liquitex Bright Aqua Green, neon yellow and neon orange paint.  I added more paint in a couple other colors, then used a Sharpie to trace ABC down the side.  After that I used Reeves Watercolor Crayons to add some color in the letters and used a waterbrush to spread the color around, going outside the outline on purpose.  It's not all about coloring inside the lines.  I have a few waterbrushes, all the same tip style.  You can get all the same or assorted tips.  Here's a set with different styles of tips, to allow for different effects.  If you want to dip your toe in, here's a single, fine tip waterbrush to play with.  I'm not sure if you can find Reeves crayons, but there are several other options, such as this set from Staedtler, a Faber-Castell set, and this set from Prang


There's a couple different stamp sets at play here.  I have a bunch of small ones in my stash, and I'll have to start using them, I guess, right?  Most I used my Archival black ink, but the "NO LIMITS" was stamped in Distress Ink Peacock Feathers.  I also used a dark purple marker to add dot doodles in a few spots, and a Uni Posca white paint marker to trace the triangles.  The sentiments are from my stash.  The feather I stamped on white cardstock with the same black ink pad as before.  Then I used the Reeves watercolor crayons and waterbrush to spread the color, and added some bits of darker color with markers.  I cut them out with Tonic scissors and used Alene's Tacky Glue to attach the feathers and thread that I bunched up for a little extra texture.


I've included affiliate links to many of the products I've used or similar products, which means if you use the links to make a purchase, I make a small commission with no price increase for you.  I really appreciate your support.  I hope you enjoyed your visit and enjoy the rest of your weekend

Saturday, November 11, 2023

Peek at a WIP

Something I like to is prep a lot of work at one time.  A quick post today to show you a little in progress work.  Hopefully it will help you with whatever art you want to play with.

This is a piece of 12 x 12 patterned paper that I didn't like, so I flipped it and started playing.

I used a lot of different products, and I'll list them as best I can a little later, but I wanted to give you a taste at least.


I used Dylusions Fresh Lime spray ink, as well as a Dina Wakley stamp with a Ranger Embossing Ink Pad and Ranger Clear Embossing Powder.  If you want to get a really thick embossed image, you can use this Ranger Ultra Thick Clear Embossing Powder.  You can also use a tinted embossing ink pad, so you can see the actual stamped image before you cover it with embossing powder.  Mine is tinted blue.  There's also this Ranger Grey Tinted Embossing Ink Pad, which will do the same thing.

I hope you enjoy and I'll share some more later!  Enjoy!

Sunday, September 3, 2023

Mini Art Journal Day 7

Hi there, friends!

I'm working to catch up with posting the pages from my mini art journal for the Art Marks Challenge from Rae Missigman and Sandi Keene.

Day 7 - Create

For some Art Marks Challenge history, you can click here.  And Rae's Instagram account here shows Rae's interpretation of the prompts.  For those joining us, I'm working in a mini art journal I made out of envelopes, a hole punch, and some baker's twine.

I'm going to be posting all my pages.  Some may be in groups, or individual pages, but I will post tham all.  I also took apart my journal to make it easier to photograph, so you may see peeks from other pages.

On to Day 7's prompt, create.  What do you create?  When do you create?  Do you make time to create or do you get involved in all the other day to day things that you let creative time fall by the wayside?  Also, what do you want o create?  As I mentioned in a previous post, that's why I like working small at times.  It's easier to carve out 10-15 minutes of creative time when life gets busy.  And I'm sure we can all relate to that. 

Carving out that little bit of time is also important for other things.  To help me continue my crafting, I have side hustles going.  One is a very simple, no tech skills required, and takes about 10 minutes a day.  It's an e-mail marketing system called Cliqly.  It really is simple, I can do it when I've got the time, and it's got click and referral commissions, so the potential is there to grow.  I wouldn't waste another second if you're interested.  I've also included affiliate links for the products I've used.  I earn a commission for any purchases you make, with no price increase for you.  I truly appreciate the support!

For this page, I made the background with both yellow and orange paint through some stencils.  First I painted it yellow, then used a baby wipe through a Dylusions star stencil to remove the paint in the openings.  


Also, in my adventures in arting years ago, I found this large 12x12 stencil that had several designs on it.  Somewhat related, but I really wanted to use the different designs separately.  I had read about cutting up you stencils, but couldn't entirely bring myself to do it.  Then one day I did it, to this one stencil.  And I'm so glad I did!  It actually helps me use the stencil more because I can choose which part I want to use without having to work with a large stencil and parts of the design I may not want on that particular project.  This part is a line of chevrons, and I did the same thing as before but with orange paint.


I also used my Sharpie pen to outline some of the chevrons, but I did learn you still have to wait for the paint to dry.  The rest of the layers are a bunch of things.  I stamped the word "create" with my black Archival ink.


I used a blue Molotow paint marker for some doodles, added some die-cuts from my stash, and used an older stamp called Boy Star from Dina Wakley with the same black ink as "create."  I adhered the negative of a die-cut butterfly with the other die-cuts, as well as part of a border stamp from Dylusions Bordering on the Edge stamp set.

I'm also entering the Simon Says Stamp Wednesday Challenge.

Thank you so much for stopping by and checking out my art journal page.  Bye for now!


Busy, busy, busy...

I am so sorry I have been absent without a word.  Life can definitely get busy and sometimes unexpected events lead to adjustments. I will b...