Showing posts with label doodles. Show all posts

Friday, January 5, 2024

Yesterday, Today, Tomorrow WIPI found a work in progress

I found a work in progress tag!  I love when I do that.  Play a whole bunch and then it's gets buried to be found later.  A new year's treasure hunt!


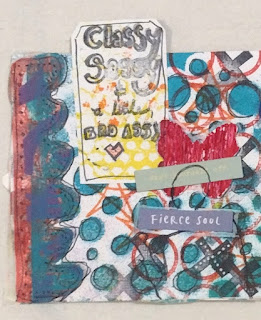
This tag is actually quite stiff to the touch.  It's covered in gesso through a stencil with some great colors added over the background pattern once dry.  Then I added more gesso through another stencil, after which I added paint through the same stencil and then outlined the letters with my Sharpie.  I also added some touches of orange on the edges.  I don't love the orange on the edge because it looks more brown.  Almost like rust.  I don't mind the rusty look at times, but I'm not sure how I'm feeling about this one.  It's definitely not done, so still some more work to do.


I've include affiliated links for items I used for this project or similar products, as well as other fun items I've included.  If you click the link I get a small commission.  The price does not change at all for you.  Enjoy the links and thank you for your support!


Any ideas on what I can add?  What do you think about the color combination?  Thank you so much for coming by!


Thursday, January 4, 2024

Tea Time with a Dapper Octopus

I decided to turn this tag was quick and quirky.  The background I shared with you on a previous post.  I grabbed several items from my stash and then added some washi tape.


I turned a quick octopus I stamped into a dapper tea drinker.  I included some embroidery floss


I've include affiliated links for items I used for this project or similar products.  If you click the link I get a small commission.  The price does not change at all for you.  Enjoy the links and thank you for your support!


 Comment below about your favorite part of my tag!  Thank you so much for coming by!


Friday, October 20, 2023

Join Me for Day 26!


Well hello!  For those who saw my sneak peek, earlier, welcome back.  If not, you're still in a for a treat!

Today I'm sharing the next page in my mini art journal for the September Art Marks Challenge from Rae Missigman and Sandi Keene.

Day 26 - Replenish


I'm also entering the following challenges:

Creative Fingers Challenge #264


Crazy is Our Fame Challenge

For some Art Marks Challenge history, you can click here.  And Rae's Instagram account here shows what she made for each prompt. I made a little art journal out of envelopes and baker's twine.  Simple but effective.  Though what Rae did with her pages was amazing, while also being simple.  She has this chunky journal with a fabric cover and she used tape to add her challenge pages to the existing journal.  Really amazing.  It reminds me to not stick to doing things only one way.  That there are always options when it comes to art.


To replenish usually means to refill, in a sense.  However, sometimes, if you take a break to replenish, you actually change something.  Taking time to replenish also is a time for introspection.  Sometimes that involves change.  You realize as you're refilling the tank, that you need to make changes to refill the tank.  What do you need to replenish?  How do you do it?  Have you ever taken time away to refill your tank and realized you needed to make changes in order to do that?  Or to make your refill last longer?


Sometimes I get intimidated by a blank page, and sometimes I get intimidated by a page filled with color and marks.  The background for this page is a small section of underpaper.  I really liked what was on the paper, but I still struggled.  I wanted to keep certain parts but I wasn't sure how.  So I decided to cover it up a bit and then add to it.  I first used a scribble stencil with some black paint.  And I thought about how while replenishing my energy, I've realized I've had to make changes.  I grabbed a couple die-cuts that were in that vein, and then used some card packing I had saved with the graph paper design and cut a scalloped border to go along the bottom, outlining it with my orange Uni Posca paint marker.


The fairy and the heart are digi stamps, from Oddball Art and Octopode Factory respectively, and colored with Tombow markers and colored pencils.  Then I used my Sakura Solid white paint marker and emerald green Uni Posca paint marker to make my top scalloped border.  I use paint markers a lot, and while I could use regular paint and a think paintbrush, a paint marker with a fine point works much better, especially if you're in a situation where you can't have the extra supplies.  It also helps with doodles.  It's much easier to doodle with a paint marker because it's like a pen.  So I have several paint markers from a few different brands.  Although not all paint markers are the same.  Some paint markers have different tips, so it is important to consider what you want to do with the paint markers.


In general, getting my paint from here works out very well for me.  Even the store brand is good quality.  Sometime you have to do a couple layers to get a good coat, but it all depends on how opaque you want the paint layer.  I find that sometimes I like the thinner layer so the underneath layers peek through.  That gives my art texture and dimension, which I love.


Thank you so much for coming by and I hope you enjoyed this art journal page.  Bye for now!


Sunday, October 1, 2023

Mini Art Journal Day 18


Hi there my crafty friends!

I'm so glad you're visiting!  I have another page in my mini art journal for the Art Marks Challenge from Rae Missigman and Sandi Keene.

Day 18 - Tend


I'm also entering my page into these challenges:

Simon Says Stamp's Wednesday Challenge - Anything Goes


For some Art Marks Challenge history, you can click here.  And Rae's Instagram account here shows what's she's making for each prompt.  For those who haven't seen my previous posts yet, I'm working in a mini art journal I made out of envelopes.  You can use many different types of paper, including scrap or underpaper.  A hole punch and some baker's twine later and a mini art journal for the challenge ready for art!

I've mostly posted individual pages, and I do plan to post them all.  This challenge has been very interesting thus far, because it makes you think.  Not that I mind thinking.  Sometimes a good brain dump on your art journal page is just what you need.  Whether it's actual writing that you incorporate, writing and your art covers it up, or the art itself represents the brain dump.


When I saw the prompt, a lot of ideas swirled in my head.  What do you think of when you hear the word "tend."  Granted, the word tend has different meanings.  However my mind immediately went to the definition of caring for something.  You can tend your child(ren), a garden, a relative, or even yourself.  I've been doing a lot, in a sense trying to do everything, even though that's impossible.  So tending to myself can fall by the wayside.  And I think many people fall into that.  Everyone gets busy with life: work, kids, friends, taking care of the home, and I'm sure you can come up with many more.  Tending to yourself, caring for yourself, can get pushed the bottom of the priority list, which isn't good either.  So I need to tend to myself more.

My background is actually two layers of gelli prints.  One is on cardstock, the other is on deli paper.


I used a border stamp from Dylusions Inbetweenies stamp set, with Ranger Archival black ink, and  heart stamp with Ranger Distress Ink in Salty Ocean.  I know I've said it before, but I love my Ranger archival ink.  I really want it in more colors.  And there's lots!  Sometimes I don't mind the ink not being crisp or maybe spreayed with water and a tag dragged through it for a nice effect.  But the archival ink always give a crisp image and doesn't smear.  You can add any wet medium over it and it will stay put.


All the die-cuts are from my stash. I used a Sharpie pen and my Uni Posca white paint marker for the doodles.  I also used a red marker from my lovely Tombow markers to add some doodles to a die-cut.


Thank you so much for stopping by and checking out my art journal page.  Bye for now!

Friday, September 29, 2023

Mini Art Journal Day 17

Hi there my crafty friends!

I'm so glad you're visiting!  I have another page in my mini art journal for the Art Marks Challenge from Rae Missigman and Sandi Keene.

Day 17 - Poise


I'm also entering my page into the following challenge:

Creative Fingers Challenge #262


For some Art Marks Challenge history, you can click here.  And Rae's Instagram account here shows what's she's making for each prompt.  For those who haven't seen my previous posts yet, I'm working in a mini art journal I made out of envelopes, but you can use many different things, including scrap or underpaper, so some pages already had stuff on them.  A hole punch and some baker's twine later and a mini art journal for the challenge ready for art!

I've mostly posted individual pages, and I do plan to post them all.  This challenge has been very interesting thus far, because it makes you think.  Not that I mind thinking.  Sometimes a good brain dump on your art journal page is just what you need.  Whether it's actual writing that you incorporate, writing and your art covers it up, or the art itself represents the brain dump.

For this day's prompt, Poise, what defines poise to you?  What gives one poise or how is it expressed?  Being poised could mean to be balanced.  It can also mean holding oneself or an object in a certain manner.  I've heard being poised and being graceful can go hand in hand, which is certainly one way to look at it.  I like that my page shows being balanced between having fire while not sacrificing respect for yourself.


My background is another gelli print, a simpler one.  I was experimenting with sprays, which I really love.  I love the effects you can create with them.  They dry fast, but depending on how you spray, they can stay wet long enough to mix colors.  I also love using the top part for adding drips or tiny drops.  I was using a Dylusions stencil with some Heidi Swapp Color Shine sprays.  They're sparkly, but not overwhelming.  I don't mind some sparkly, but I don't necessarily go fully glitter, sequins, etc.  So these sprays are really nice.  I used Teal with the Dylusions stencil.  The Color Shine sprays came in many colors, like Sweet Mint, Raspberry, and Ocean.


I added a border out of gelli printed deli paper that I made using various paint colors, some die-cuts, doodling with my Sharpie pen and my Uni Posca white paint marker.  The butterfly is from a package of corrugated cardboard shapes from my stash, colored with a red paint marker.  I also added stamping with Archival black ink.  The tag is actually an experiment.  I used an acrylic stamp from Badass Art on some scrap and I really liked it, so I cut it into a tag to use later.  Enter later.  My Sharpie outlined the edge, I added a tiny heart from Oddball Art.  I also traced a Dylusions girl mask near the bottom for some added punch.


Thank you so much for stopping by and checking out my art journal page.  Bye for now!


Tuesday, August 22, 2023

Mini Art Journal Day 3

Hello crafty friends!

I'm so glad you're here.  I have another page in my mini art journal for the Art Marks Challenge compliments of Rae Missigman and Sandi Keene.

Day 3 - Leap

Here's a peek:


My first thought was a leap of faith.  It got me thinking of what a leap of faith is; trying something and believing it will work.  Even if there are obstacles in your way, you don't let those obstacles stop you.

It's interesting because I've tried to do that in my life, recently to improve my financial situation.  I know, I know, isn't everyone?  Of course, and I hope you're succeeding in whatever endeavor you're trying.  One leap of faith I've taken is signing onto an easy e-mail system called Cliqly.  It's super simple, everything set up for you, and takes about 10 minutes a day.  You sign in and send e-mails, earning click commissions.  If you use your referral link, which you don't pay to get, you can also earn referral commissions.  It's not a get rick quick scam; it actually takes time.  However, putting the time in on the front end means you get the rewards long-term.

I'm also an Amazon affiliate.  Simply put, if you follow some of the link and make a purchase, I make a small commission.  So I'll thank you in advance.  Thank you!!

I'm also entering my page into these challenges:

Creative Fingers Challenge #260 - Anything Goes

Crazy is Our Fame August Challenge


For some Art Marks Challenge history, you can click here.  And Rae's Instagram account here shows what's she's making for each prompt.  For those just tuning in, I'm working in a mini art journal I made out of envelopes.  I've also done this out of scrap or underpaper, so some pages already had stuff on them.  A hole punch and some baker's twine later and tada!  A mini art journal for the challenge!

I'm planning to post all of my pages, though some may be individual pages and some may be in groups

Now for the reveal.  Drum roll please... 


This is a somewhat simpler page that morphed and morphed again before I was finally done with it.  I made the background using my scribbles stencil and purple paint.  A little subtler than I planned, but it works.  Then I used an old brick stencil from The Crafter's Workshop with two different paint colors: blue and black.  I'll give you three guesses which color I used first.  Okay, fine, I used my blue first, then offset the stencil and added the black.


Yes, I purposely made three line.  As I said, my original plan morphed, a couple times.  I used my white-out pen for a lot of the writing, as well as outlining the letter stickers.  Everyone feels differently about their writing.  One designer I really like, Ali Edwards, uses her handwriting in many of her stamps and images.

I'm still getting used to using my handwriting in crafting.  Sometimes I like it and sometimes I don't.  I tend to like others' handwriting better.  For some reason, it always looks cooler, but I'm still working on it for myself.


I used my black Sharpie to outline the words I wrote, as well as the doodle stitches on the labels.  The label has been sitting in my stash for a long time, and the label is long itself, so that's saying something!


The letter stickers are from a sticker sheet in my stash, and I used a Uni Posca fine point paint marker in white to outline the head.  The head, in turn, is from a Dylusions stamp set called Dependable Dolly.  It's an older one, so it can be harder to find.  Have I mentioned I have quite the stash?


I at first didn't have the labels on the head on the layout.  And I was okay with it...until I wasn't.


So I took to my stash of die-cuts, which are from kits, store-bought, and stamped images I colored and cut out, to find one that fit.

It was funny, because there were a couple I had thought to use, but they were actually too big!  One of the only issues I would say to working in a small journal.  Some images are just too big, even if you cut them.  But this head fit the space very nicely, and the little pops of purple matched the background in a subtle way.  Once I attached the head and labels, I called it done.


Thank you so much for stopping by and looking at my art journal page.  Bye for now!


Busy, busy, busy...

I am so sorry I have been absent without a word.  Life can definitely get busy and sometimes unexpected events lead to adjustments. I will b...