Hello there! Ready for some more crafty fun?? I'm joining the Simon Says Stamp Wednesday Challenge, which is.... Summer!
I love summer. The warm weather, the beach, the colors, the fun. School's out for some, but it's fun for everyone.
My entry for this challenge is a tag. I absolutely love tags. I may become a broken record with all the things I love, but it's true. Similar to ATCs, tiny canvasses that are ripe for experimentation and play!

In looking through my tag stash, I chose this one. The background is fairly simple, but still lots of fun. Over top of some purple paint is green paint through a stencil designed by Ronda Palazzari for The Crafter's Workshop called Subway. A subtle design that can make a big impact.

Combing through my stash, I grabbed a piece of stenciled cardstock and a butterfly die from Kaisercraft. Butterflies say summer to me for sure, and all the bright colors of flowers blooming in summer. I grabbed my Cuttlebug and made my sandwich. For the sandwich, I set the die against the section of paper I chose and put that between two cutting plates. I then placed a spacer plate underneath, along with some pieces of cardboard to get the right thickness so the die will cut through the paper. I ran my sandwich through a couple times and out came the butterfly. Now the actual die has little holes all over the non-sharp side so you can poke out the garbage pieces as well as get the die-cut out of the die. I used my EK Tools Tweezers to poke out my butterfly.

Next I grabbed my Dylusions stamps, again. Yes, I may have a problem, haha. The eyes were already stamped from the Pondering Petunia stamp set, cut out, and colored. See anything special about the eyes? Psst...they're two different colors, green and blue. I love ready made bits and bobs to add to my projects. Thephrase is from another Dylusions stamp set called Say It How It Is. I love the attitude inherent in these stamps.

See the different color eyes now? It was a surprise to me too; I had forgotten I even colored the eyes differently. The swirly red circle, heart, and "where to next?" die-cut are all from my stash. The red swirl is a fussy cut from a piece of double-sided patterned paper.
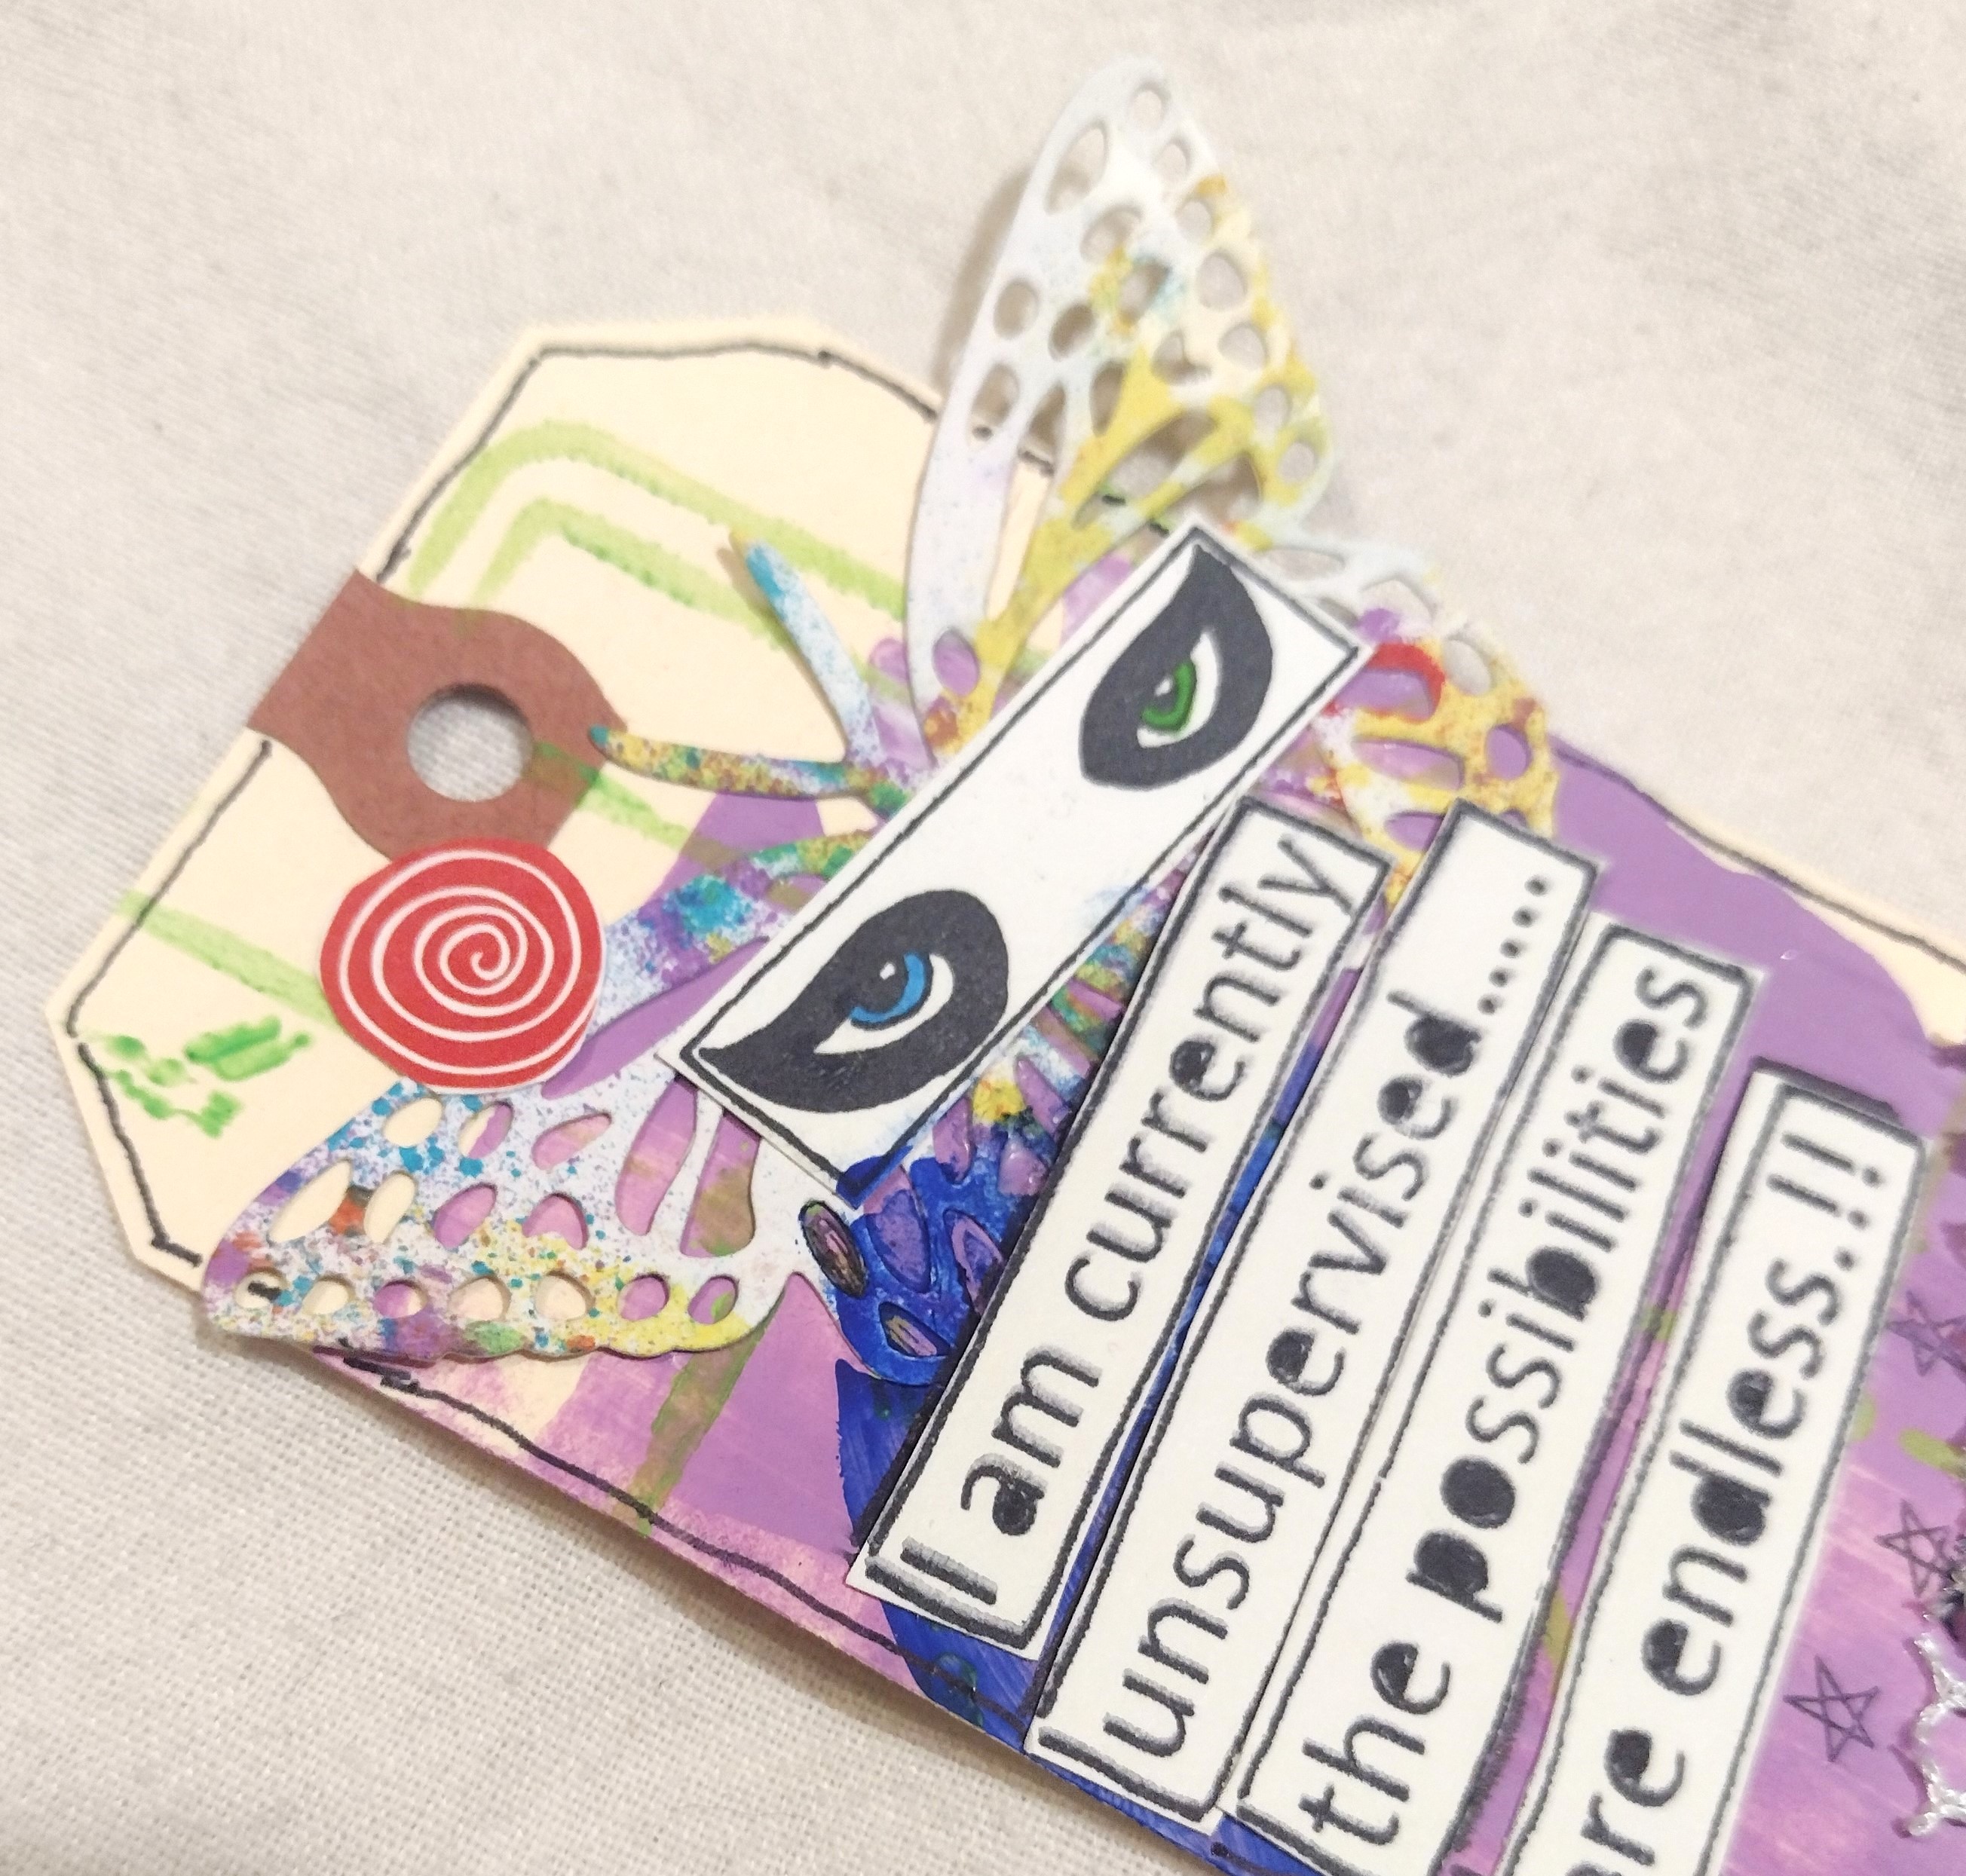
As you can see I also swiped some Artist's Loft Ultramarine Blue on the butterfly for a little added effect.
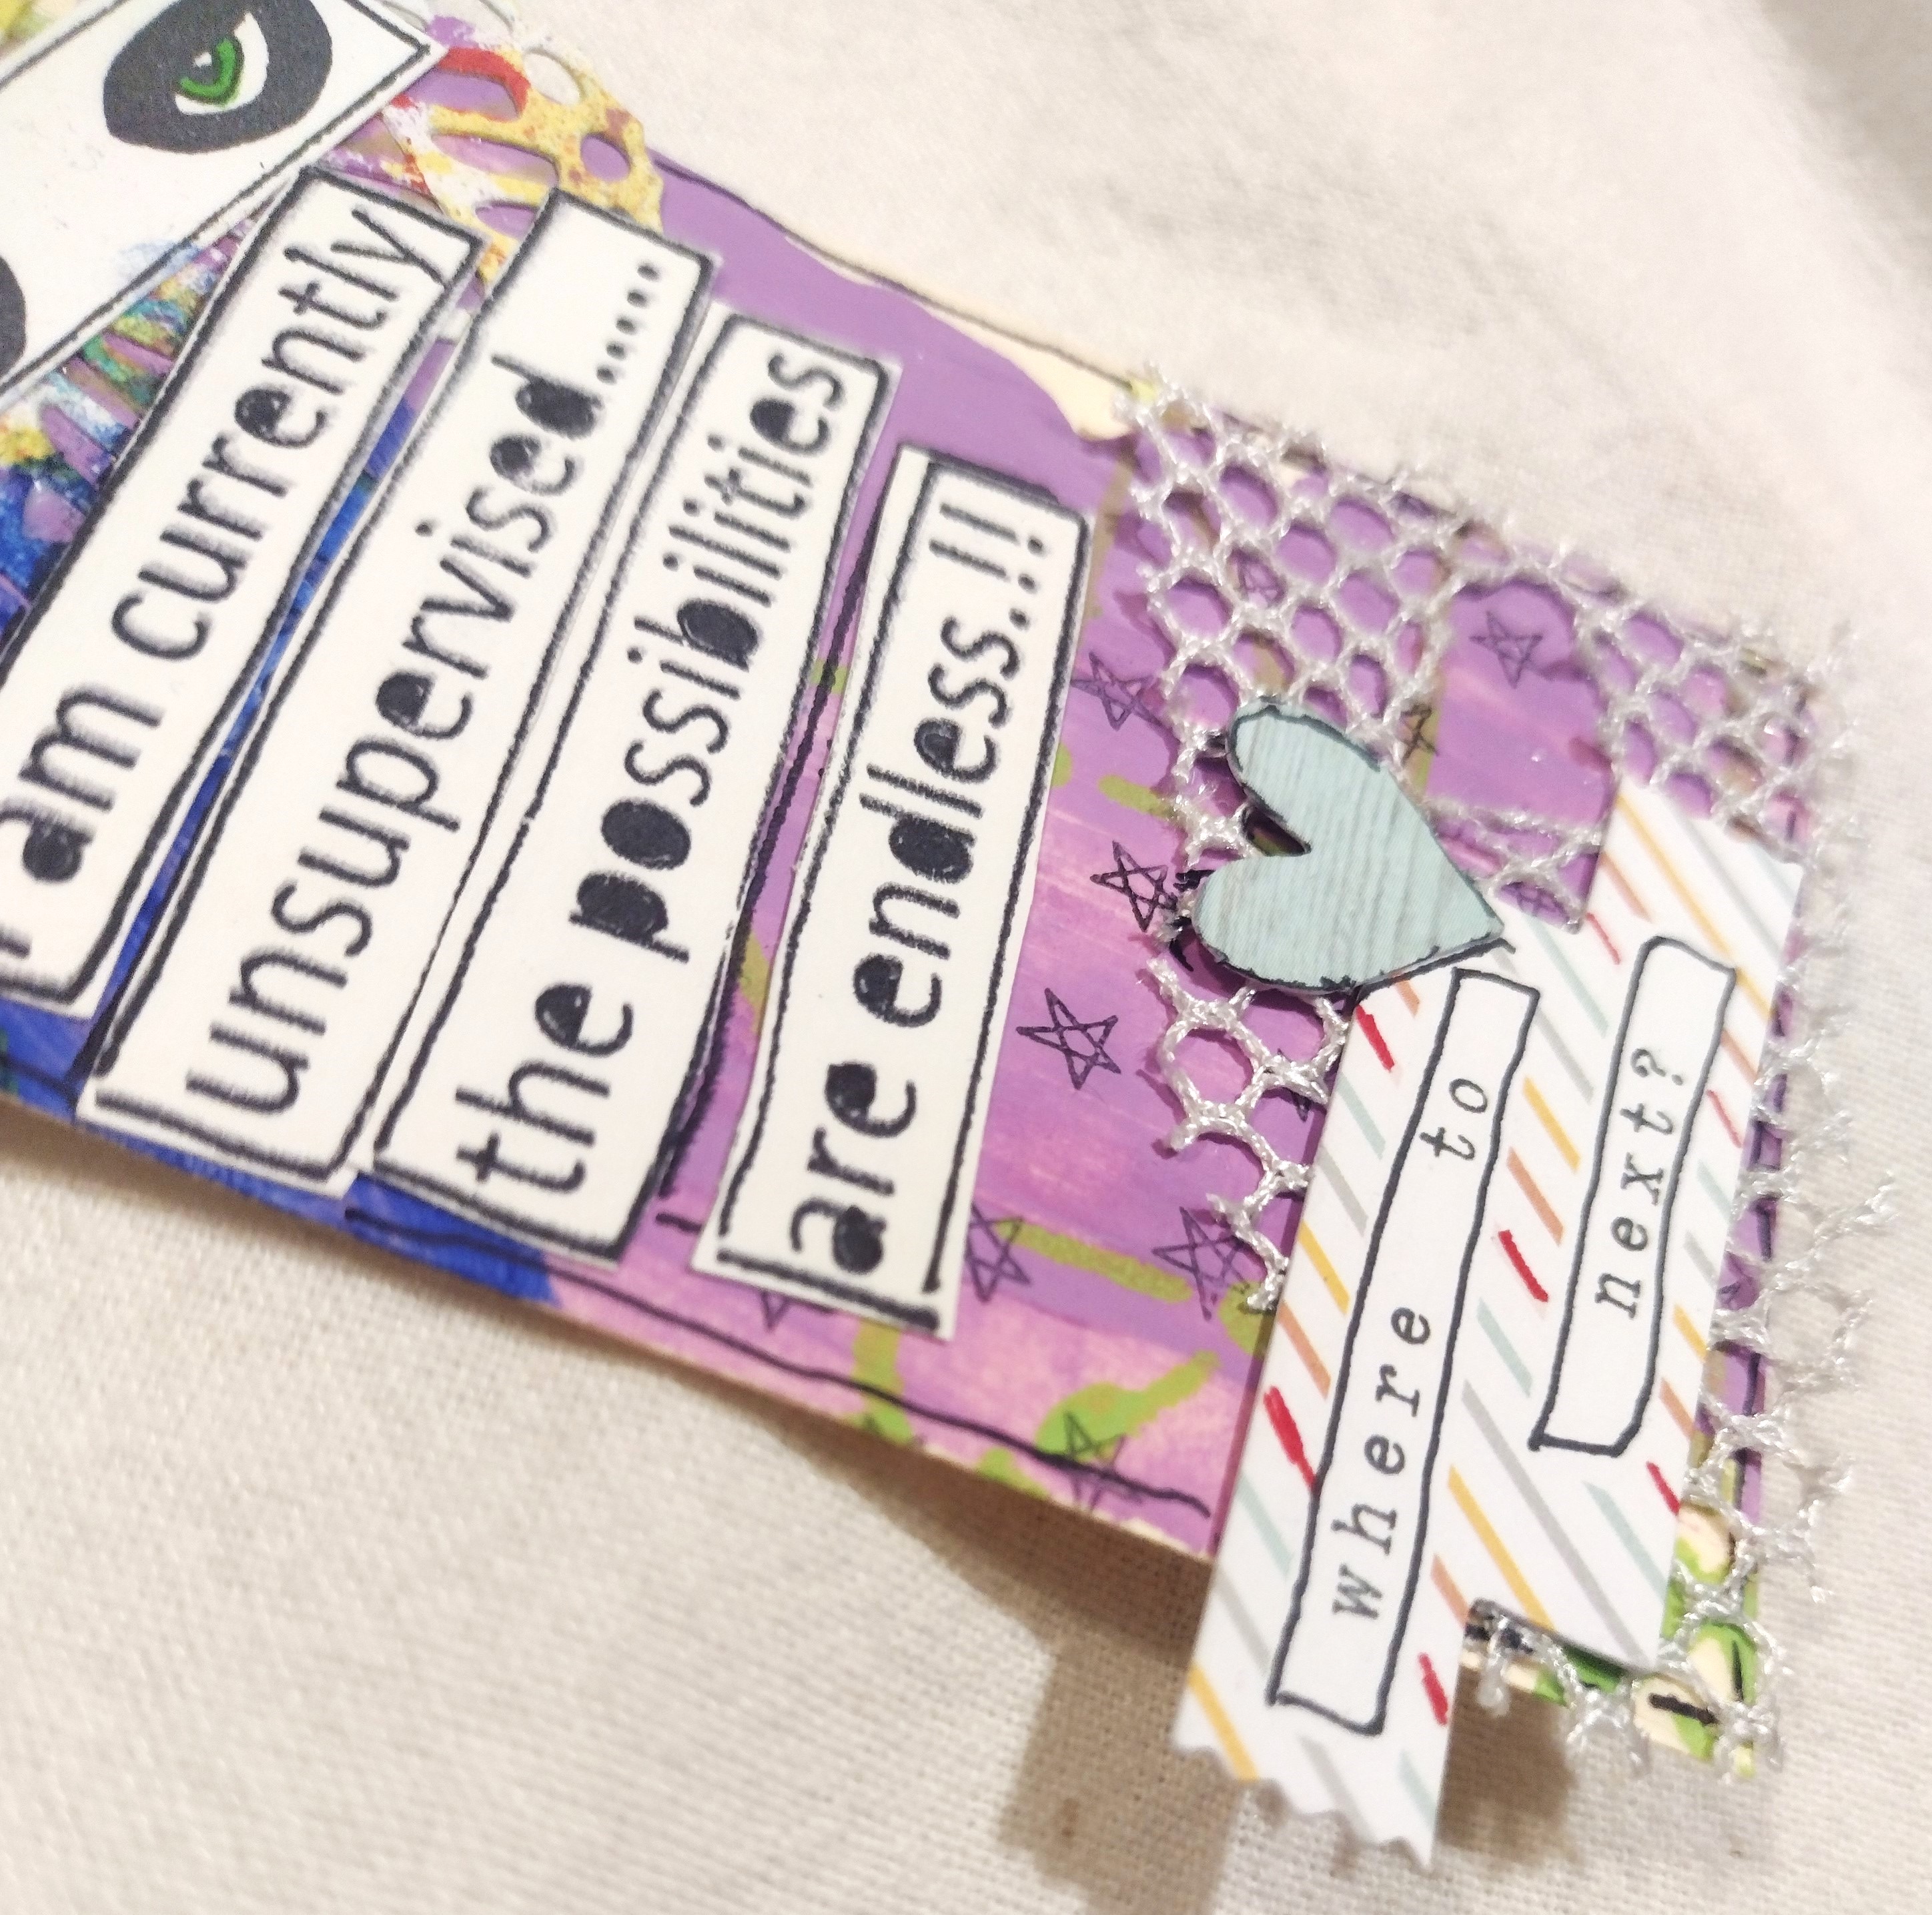
I stamped the bottom of the tag using a mini star background stamp from an old acrylic Studio Calico stamp set. Then I attached a piece of netting from an old laundry bag. I put the netting on top because it reminded me of boating, which I've done a little of and it reminds me of summer and going out on the water. The heart and word die-cut are from past kits.

I glued everything down with Crazy Glue, and used my black Sharpie (I mentioned it's a favorite of mine, right?) to outline the edge of the tag, the heart, the inside of the "where to next?" die-cut, and lastly filled in the open spaces in the letters from my Dylusions Say It How It Is rubber stamp set. I really like how it turned out.
Thank you so much for coming along. Bye for now!


